
Posts in category microscopes
Using the Zeiss-Abbe polarizing attachment for their 19th century microscopes
It’s now over a year since I described how to use the Abbe polarizing attachments with one of our late 19th century jug-handled microscopes. Since then, I’ve had one disappointment. The attachment does not fit any of our more “modern” (ie 20th century, with electricity) microscopes and I’ve had to continue using the mirrored model.
My original attempts to use them all employed thin mineral slices because I wanted samples with known, reliable reactions to the polarizing light, but then I started considering what they were actually used for in Microbiology or Botany laboratories. We have at least 20 of the adaptors, plus a number of partial or damaged kits, so they must have originally been used for teaching before WW1. It seemed a good idea to test their performance with biological samples.
In all of the image pairs presented here, the first image is without polarization, and the second with it.
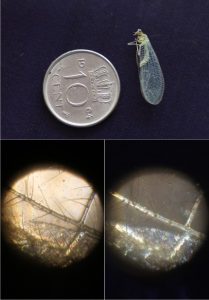
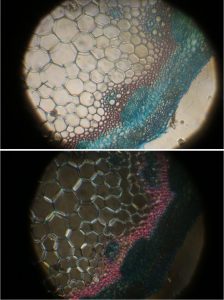
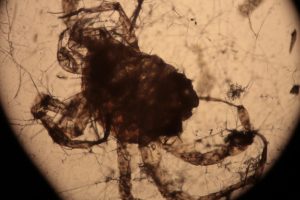
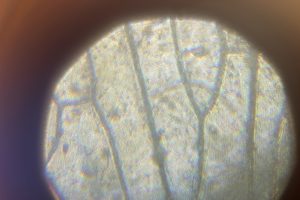
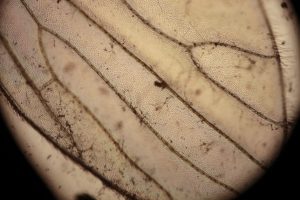
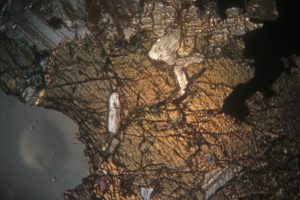
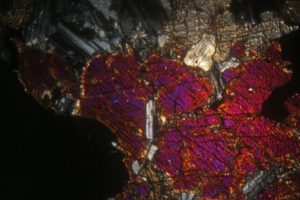
The first image set (above) shows two of my standard microscope-testing samples (very useful for comparisons). The insect is a lacewing and the sample came from one of its wings. Despite the fact that the lacewing has been dead at least 2 years (it was “rescued” from a spider’s web), the veins gave clear, silvery-white fluorescence with polarising light. The thin section is a commercially bought, stained section of a plant stem. From comparisons with other samples, it is the stains that fluoresce, not the fixed plant tissue.
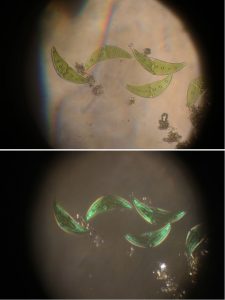
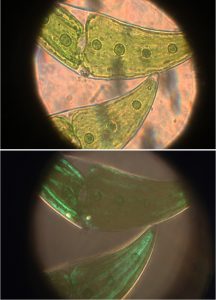
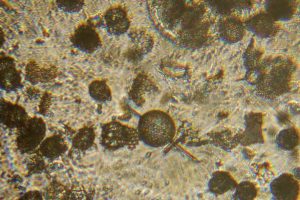
The remaining images (above) were made with living algae (Closterium sp.) at 2 magnifications (Zeiss lenses C and D, but their magnifications need to be recalibrated because of the distance of the camera’s sensor from the lens). It appears that only sections of their chloroplasts were fluorescing. The sample had been taken a week previously from a pond in the area where the Berkelsemeer (Van Leeuwenhoek’s first microbial hunting ground) used to be.
Guessing from the location of the cupboards where we found the attachments, it seems likely that they belonged to the Botany department. We’ve recently found a few of their practical handbooks in the archive – maybe one day I’ll be able to try the attachments with the original experiments! First, I want to try the other microscopes in our collection.
Playing with our Nuremberg microscope
There is a great deal of fun to be had from working with old microscopes whose instruction books are lost in the mists of time (if, indeed, they ever existed), whether it’s a single lensed microscope from the 17th century, or something a little newer. There is a lot to be learned, not only from how they were used, but also from their limitations. Modern digital cameras also make it much easier to record results.
Some of the wet Sundays of this winter have been spent on the Collection’s Nuremberg microscope. Since it is made mostly of wood, cardboard and shagreen (and the glue used in its construction is failing), after over 200 years it is far too fragile to take apart completely for cleaning. It can’t withstand my usual use of a camera body (Canon M10 or M6) mounted on an adapter in place of the ocular. Instead, I used a small tripod and a digital camera body fitted with a macro lens so that nothing had to touch the microscope. This had the advantage of providing images as the microscope had been used, with both of its own lenses. The mirror is in reasonable condition, and was lit with the LED lamp used in previous experiments. One word of warning for anyone else with one of these microscopes. The little glass lens was not attached to its wooden holder and fell into my working tray as I opened the lens holder. Whether this was normal, or whether the glue used to hold it in place has completely deteriorated, I don’t know. There was none visible on the lens or holder.
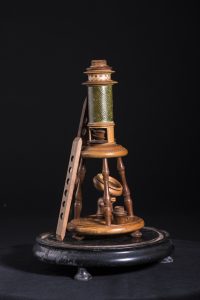

Nuremberg microscopes are frequently provided with small wooden sliders containing pre-mounted samples. One of these can be seen to the left of the microscope in the first photograph, above. Using the sliders with this microscope was very frustrating as only shadowy outlines could be seen.

Checking the sample slider with a 20th-century Olympus microscope revealed that most of the samples had either broken up or were just shadows in the adhesive holding the slide together. The 3rd of the set below is the only one that gave even a reasonable image.
Better results were obtained when I tried modern slides with the Nuremberg microscope. On the left, below, diatoms, and on the right, a stained section through a plant stem.

The insect wing image on the left, below, was made using the Nuremberg microscope, the image on the right is the same sample photographed through the Olympus microscope. Focus with the Nuremberg was difficult because it requires moving one cardboard tube up and down inside the other and, as already mentioned, the microscope is extremely fragile.
Considering that this microscope was made by a woodcarver over 200 years ago, presumably as a copy of a brass microscope, I was pleasantly surprised with the quality of the images of modern samples, especially since I had previously tried it with the sliders and concluded that the microscope really wasn’t very good.
It is now back in its display cabinet for safekeeping.
And I’m wondering what to try next!
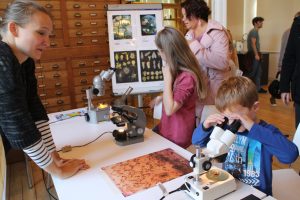
We’re open on Sunday 28th October!
The Delft Science Centre will, like many other places, be open for “Wetenschapsdag” (Science Day) on 28 October 2018 between 11:00-16:00.
Among the exhibits, we will be showing what you can do with microscopes old and new, and the Beijerinck Office Museum will be open to escorted groups.
The Minerals Museum will also be open, with VR demonstrations.

The full programme (in Dutch) is available here: https://www.tudelft.nl/sciencecentre/activiteiten/wetenschapsdag/.
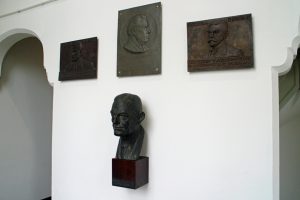
Presenting historical microscopes
Now that we’ve finished unpacking and sorting the collection, and the cataloging is well under way, the next priority is to improve the way that it is presented to the public. In this context, “public” can mean anyone from an international group of Professors on a visit to the Netherlands to members of the general public who visit the Science Centre at the weekend. In anything that we do, we must reach a happy balance between too much or too little explanation, without cluttering up any displays.
We also have the interesting problem of several boxes (labelled “microscope parts”) of mysterious lenses from unknown makers and other items. Fortunately, we have now teamed up with the Dutch Foundation for Historical Microscopy (here: http://stichtinghistorischemicroscopie.nl/en/) to try and solve the mysteries.
Some of the stars of our Brendel flower model and microscope collections can now be seen in display cases in the public areas of the Centre, but we have much more material than we can display. Some of the brown wooden boxes contain equipment such as microtomes, microforges and densitometers, so it was a useful exercise to investigate them all.
For good cataloging as well as publicity, everything needed to be well photographed. Jan Sluijter, the professional photographer who also worked on the Science Centre’s Minerals Collection (which goes back to the middle of the 19th century), therefore spent a fair amount of the winter/spring here.
We decided that we did not want to try and restore any items to factory perfection, but to leave the evidence of their long working lives. Some microscopes had obviously only had one careful owner (to borrow from car salesmen), others had been used by hundres of students in practicals. In addition, Jan photographed everything on both black and white backgrounds and made short film clips showing each item rotating on a turntable. It’s amazing how much difference the colour of the background makes, as can be seen in the two photos of the same Carl Zeiss Jena “jug handled” microscope with fitted camera lucida, below.
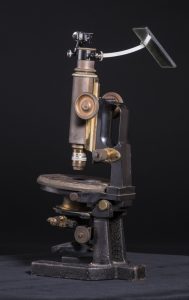
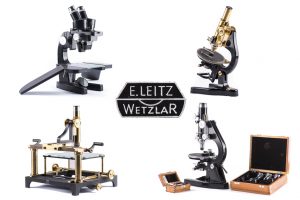
Jan’s now experimenting with different ways of showing representativeparts of the collection (see the Leitz and Bleeker microscopes, below). I still can’t decide whether I prefer the white or black backgrounds, but I think that the black is winning!
Thoughts on Van Leeuwenhoek’s optical tool box
My personal project to find the descriptions of methods buried in Van Leeuwenhoek’s letters and to try and work out how he did things that he didn’t describe continues. My most recent results have now appeared in the Nov 2017 FEMS Letters with the POI: https://doi.org/10.1093/femsle/fnx247. The paper covers problems encountered with using the classical microscopes with some samples that we know he studied, and suggests a solution.
Antoni van Leeuwenhoek did not limit his research to microorganisms. Indeed, he worked with a very wide range of samples ranging from wood and animal tissues through insects to individual cells and sperm to bacteria. His microscopes work very well with transparent samples where the light can pass through them (and the samples were small) but, as can be seen from Figure 1, he was obviously also using reflected light.
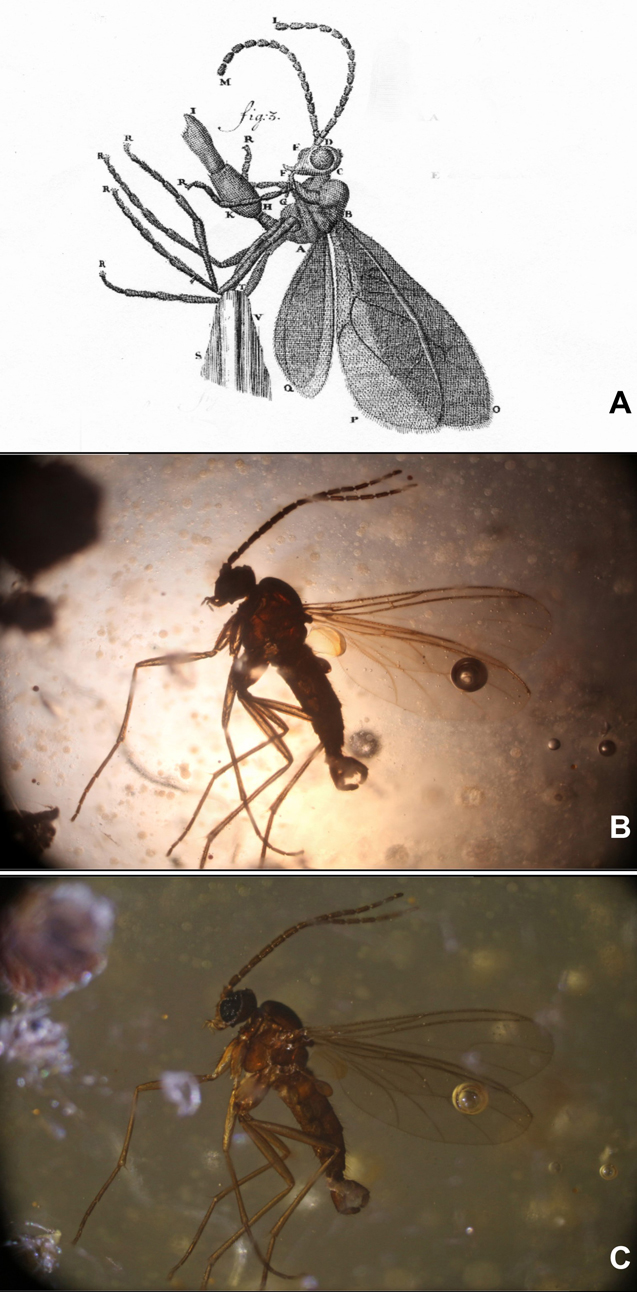
Transmitted and reflected lighting of a gnat
Figure 1A shows a drawing of a gnat, taken from a 1702 Van Leeuwenhoek letter. Figures 1B and C. show a similar insect photographed under a 19th century Carl Zeiss Jena microscope with transmitted (B) and reflected (C) light. It is clear that the level of detail shown by Van Leeuwenhoek cannot be observed on the silhouette shown in B.
The details are all in my papers, but my conclusion is that, as he did with his aalkijkers (his microscopes for viewing the blood in the capillaries of the tails of small eels and fish where the sample pin was replaced by a glass tube to keep the specimen alive), Van Leeuwenhoek adapted his magnifiers to suit the task in hand.
Figure 2 shows a collection of magnifying equipment that I think Van Leeuwenhoek used as his optical tookbox. The photographs show modern facsimiles, the drawings were made during or just after Van Leeuwenhoek’s life. This conclusion is based on experimental results and historical documents.
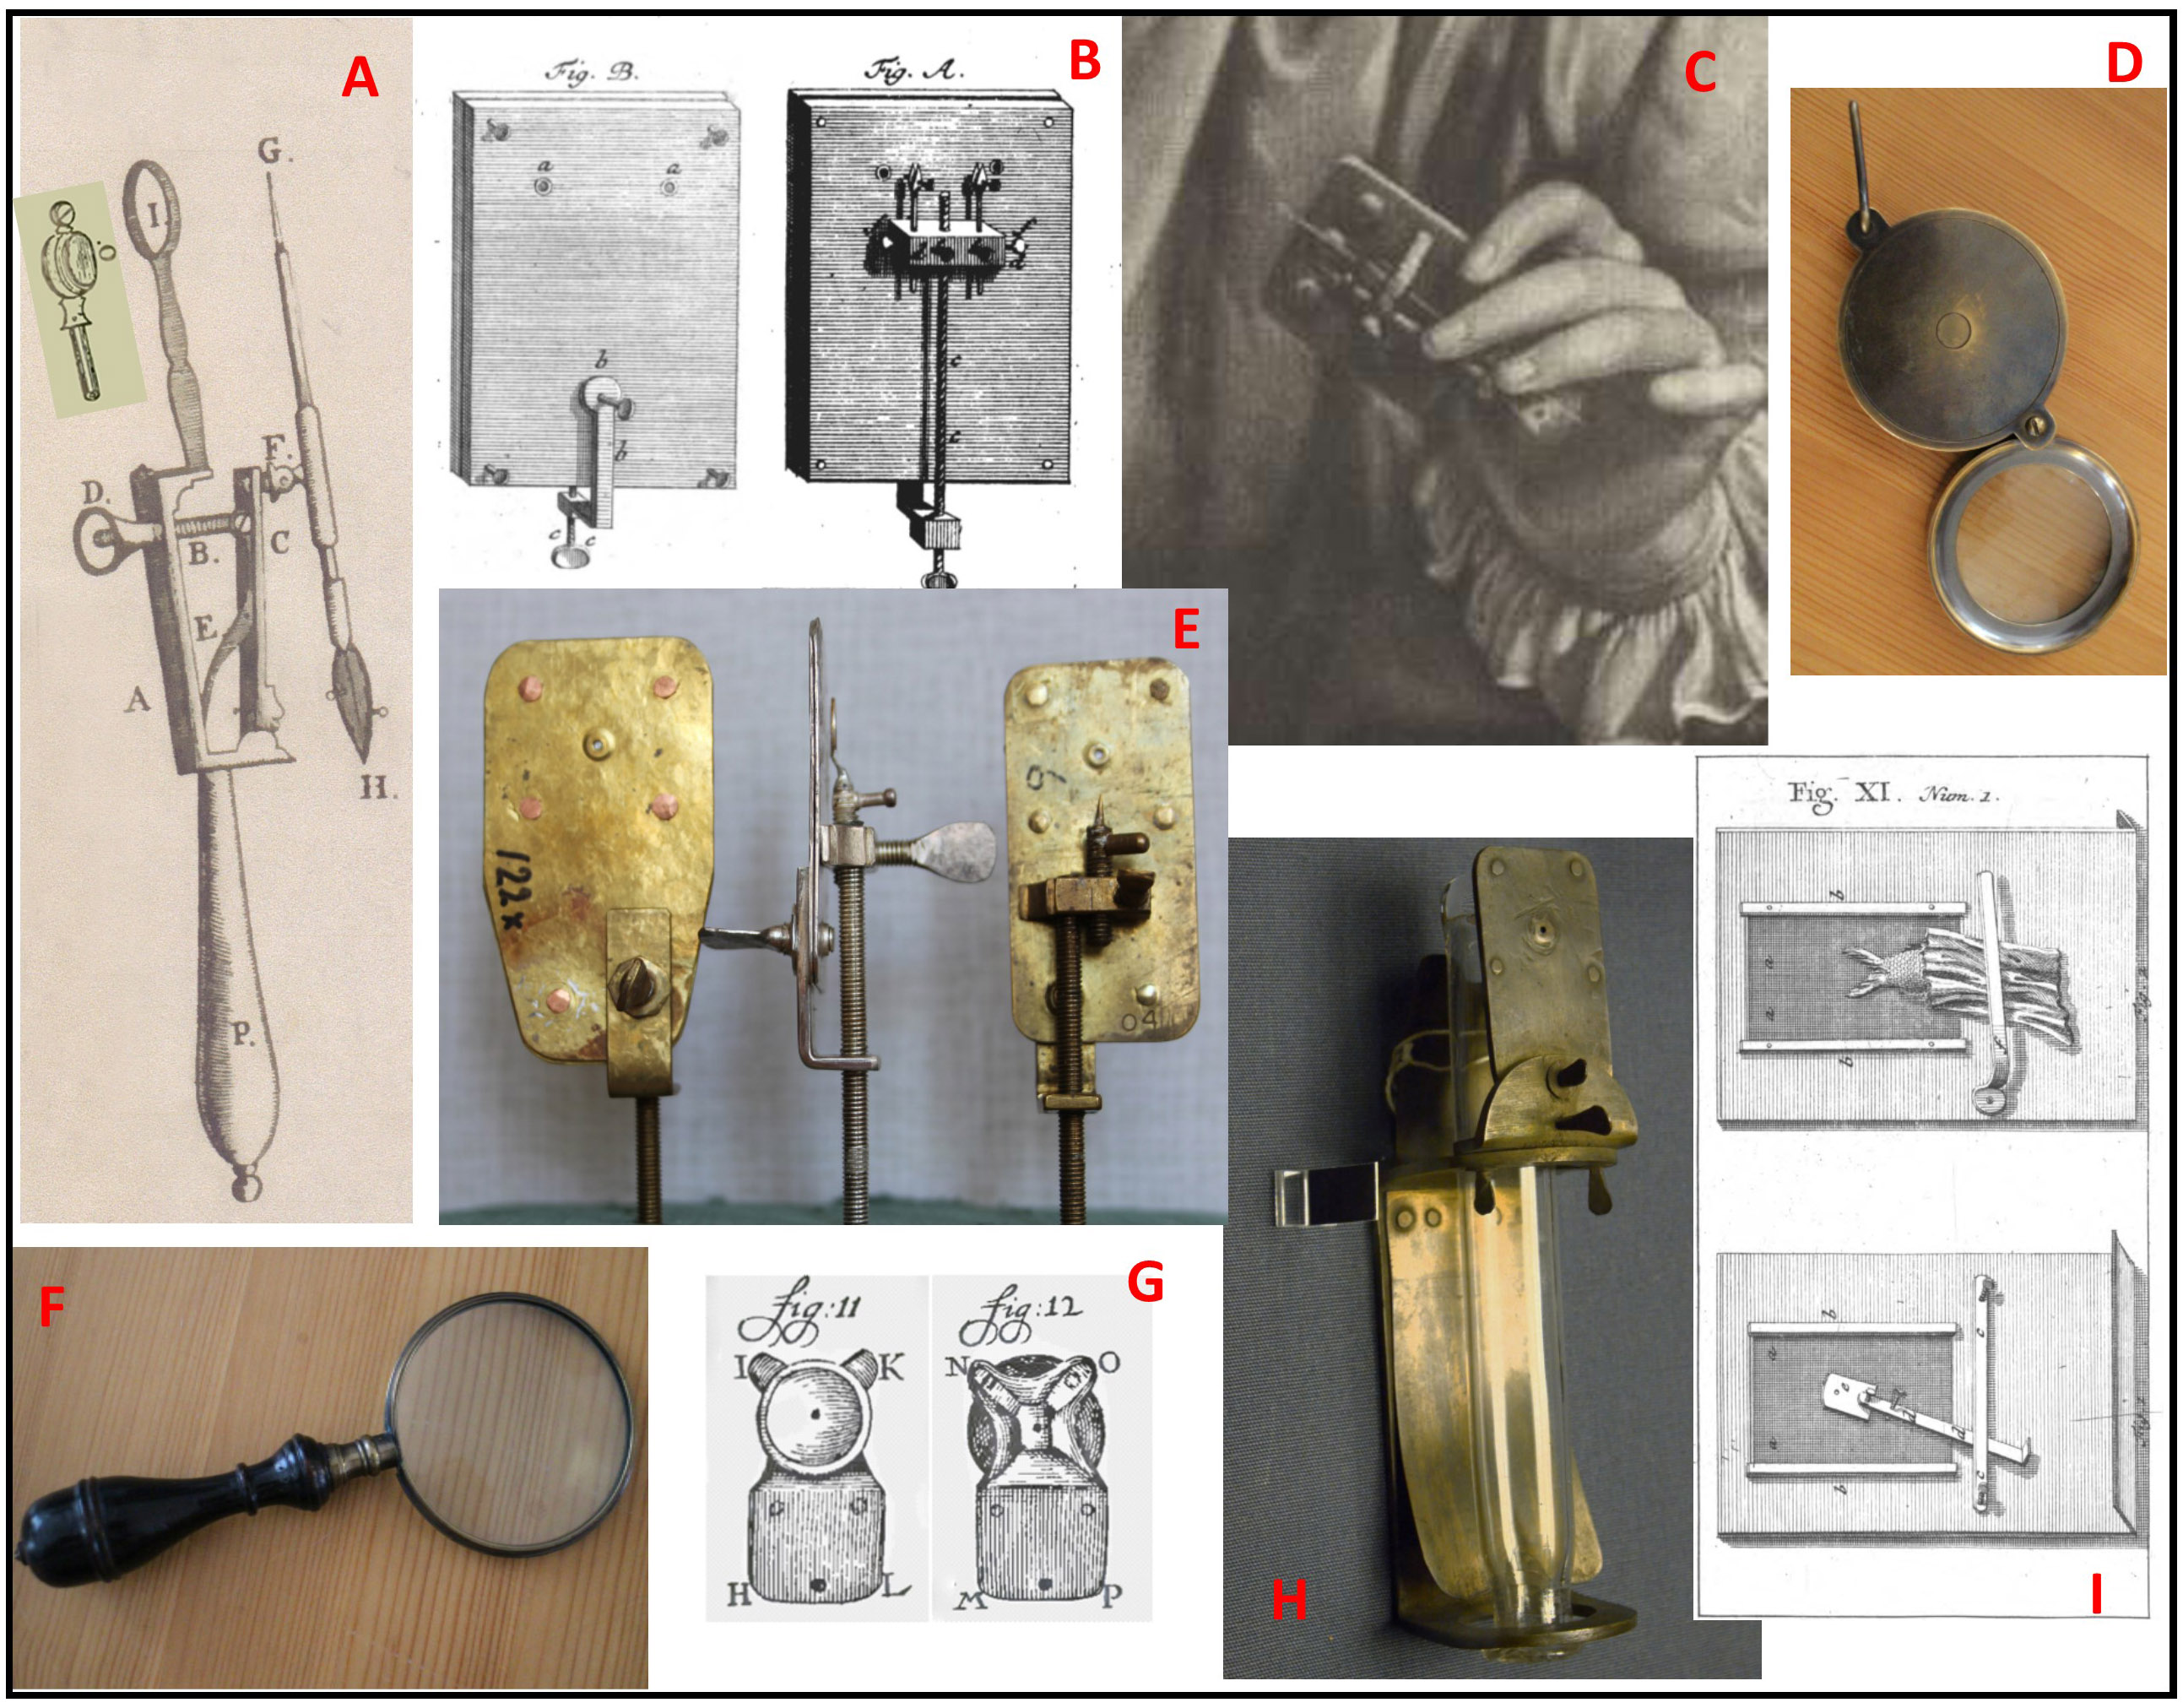
Figure 2: Optical toolbox
A: This magnifying glass (or something very like it) appears in the frontispiece of the auction catalogue for the sale of Van Leeuwenhoek’s microscopes after his daughter’s death. Because the lens is set into a simple ring rather than the metal plate of the Van Leeuwenhoek microscope, the setting does not cast a shadow on the sample if reflected lighting is used.
B: This version of the Van Leeuwenhoek microscope was published by a German visitor (Zacharius-Conrad von Uffenbach), and microscopes with 2 lenses are mentioned in the sale catalogue. With 2 different lenses side by side, it would have been more convenient than moving a fragile sample to another microscope for a different magnification.
C: This 3-lensed microscope comes from an engraving made while Van Leeuwenhoek was in the prime of life, and is also mentioned in the catalogue. Note the holder for a capillary (used for liquid samples such as blood) beside the sample needle.
D and F: Copies of 17/18th century magnifying glasses, as sold by the Rijksmuseum Boerhaave. “Burning glasses” are mentioned in the inventory of the Van Leeuwenhoek house after Maria van Leeuwenhoek’s death. As well as magnifying larger samples, they can be used to control the lighting of samples on the microscopes.
E: Some of the facsimiles of existing Van Leeuwenhoek microscopes made by Hans Loncke and used in my experiments.
G: Van Leeuwenhoek’s adaption of the eyepiece on his aalkijker to allow reflected lighting while protecting the eye with a small cup.
H: A facsimile of the aalkijker drawn in Van Leeuwenhoek’s first paper on blood circulation. Note the use of the same lens plate as with the microscopes.
I: His final adaption of the aalkijker to make its use easier for visitors, as mentioned by him in a letter and drawn by Von Uffenbach.
People often describe his microscopes as crude, and perhaps they are when compared to other, ornamented microscopes of his time, but I suspect that Antoni van Leeuwenhoek was more interested in making something that would allow him to carry out his experiments rather than producing elegant instruments.
Exploring the Delft School’s microscope collection – 1.
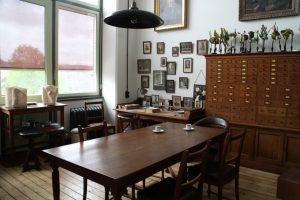
As I have mentioned before, the Delft School of Microbiology Archive has a small collection of old and unusual microscopes. We also have a range of attachments with varying (and sometimes unidentified) functions as well as two boxes of mysterious parts. One of my projects for this winter is to try as many of these things out as possible, and write a methods book for the collection.
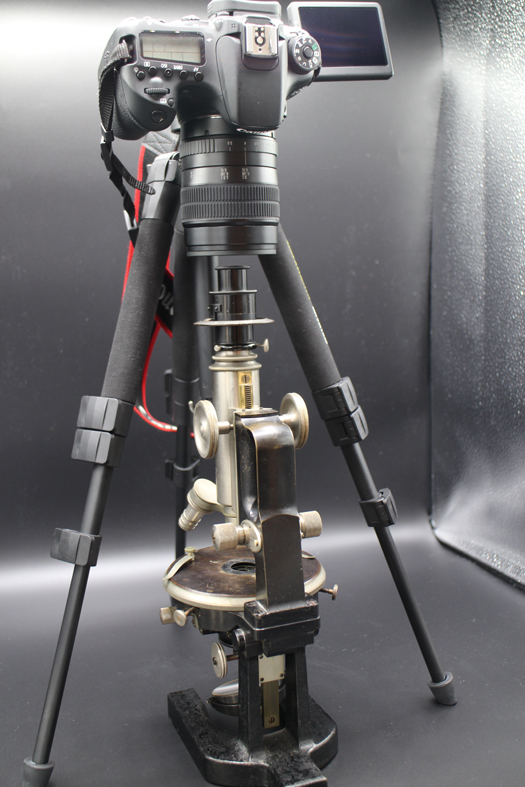
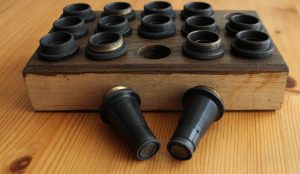
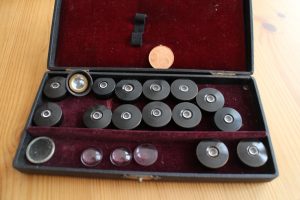
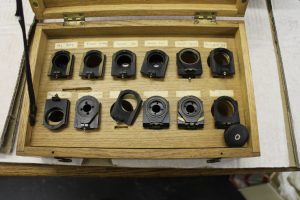
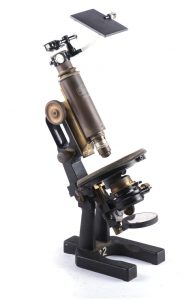
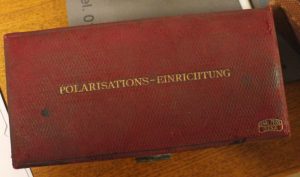
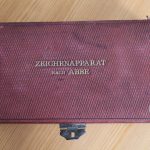
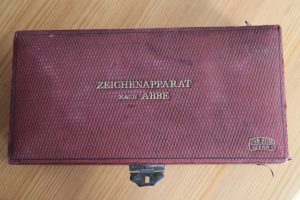
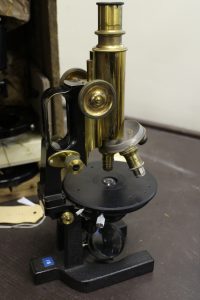
I have started with two red boxes from Ernst Abbe’s time at Carl Zeiss Jena (CZJ). Abbe was one of the founding fathers of CZJ and the inventor of many microscope techniques that we take for granted today, including standardizing lens quality. One of the boxes contains the parts necessary to convert a simple microscope for work with polarization, the other contains a camera lucida. Both were obviously routinely used in the times of Beijerinck, Van Iterson and Kluyver and we have enough of each for every student in a practical class to use them. None of the boxes included instructions, and nobody I’ve asked had tried to use either one. Since they turn up sometimes on auction sites, it seems to be worth outlining my findings here. I used my late 19th century jug-handled CZJ microscope.
-
- Abbe's polarizer
-
- Abbe's camera lucida
-
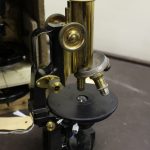
- My CZJ microscope
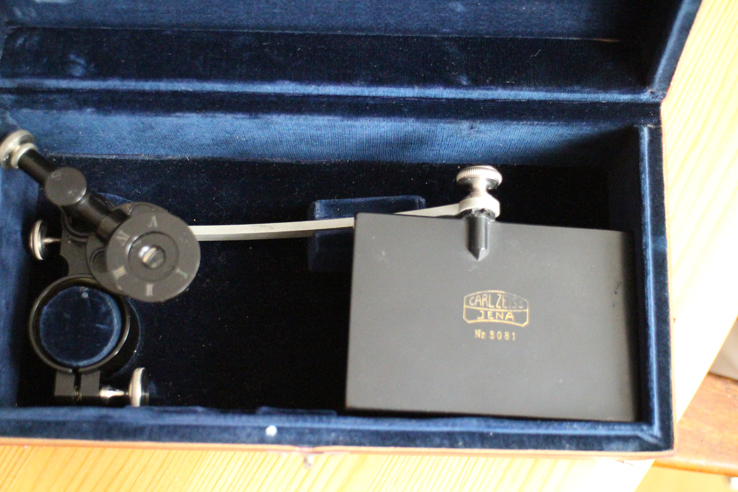
The polarizer.
The box contains a polarizer (top right in the photo), a calibrated ring (centre) and an eyepiece (bottom left). It took me a while to realize that the polarizer is actually two pieces which unscrew. The piece with the lens fits into the filter ring under the condenser, and the ring screws on underneath the filter ring to stabilize the polarizer. The calibrated ring fits around, and the eyepiece over the ocular.
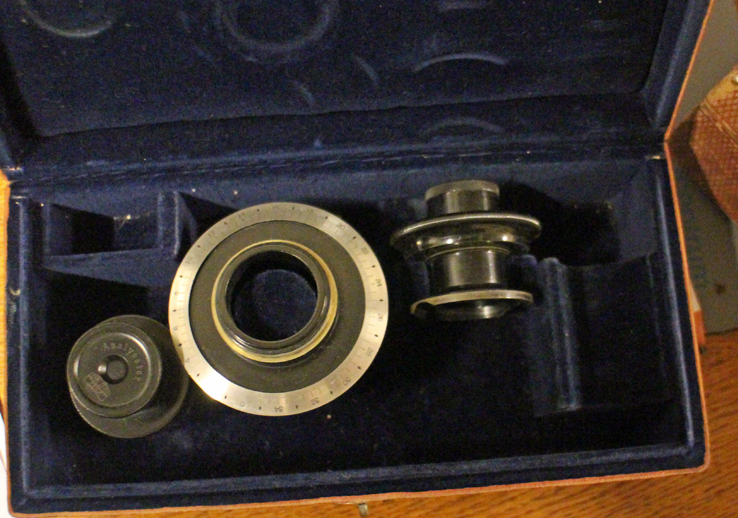
The contents of the polarizer box.
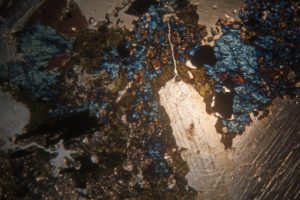
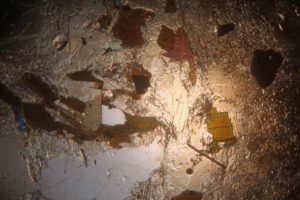
Using my usual LED lamp, I adjusted the mirror and condenser to give optimum light and then inserted a slide. Rather than microorganisms, for these experiments it was simpler to use samples guaranteed to give the dramatic colour changes associated with polarizing microscopy and so I chose mineral samples prepared for the microscope by Dr F Krantz of Bonn around the beginning of the 20th century (and also in our collection). The pairs of photos show the extremes of uncrossed and crossed polarized light paths for 3 different minerals.


The camera lucida
The box contains a ring which fits over the microscope’s ocular. Attached to the ring is an arm with a mirror at its end and a shorter, moveable arm supporting the prism that combines the images from the microscope and the mirror. The arm allows the prism to swing over or away from the ocular, allowing the microscope to be used with and without it (very useful for focusing and sample placing).
Initially, I found this attachment very frustrating because everyone I had discussed it with confidently said that it projected the sample’s image onto paper beside the microscope. This did not happen. It was only when I looked through the ocular to check the microscope’s focus and saw a ghostly pen superimposed on the sample that I realised that the projection was the other way round! Thus far, I am not very satisfied with my photographs of the combined images, but I’ll post a picture here when I’m happy with them. The problem is not in using the equipment, but in convincing the camera that it can focus on the pen and sample at the same time – I see that CZJ’s catalogues of the time also offer a drawing platform for use with their camera lucida which was presumably exactly the correct height. If anyone wants to try, I’ve had better results with cream coloured paper rather than bright white paper which tends to reflect more in the field of view. Reducing the light in the room also helps.
Recent Comments